How to Make an Easy Chalkboard Table Runner for $7

Chalkboard Table Runner
courtesy of https://www.essexapartmenthomes.com

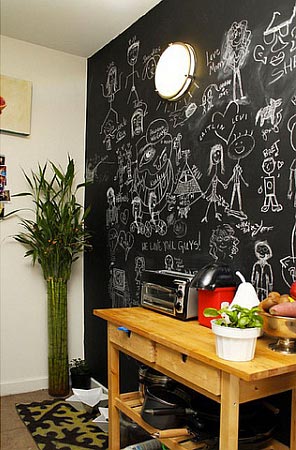
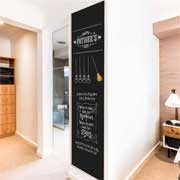
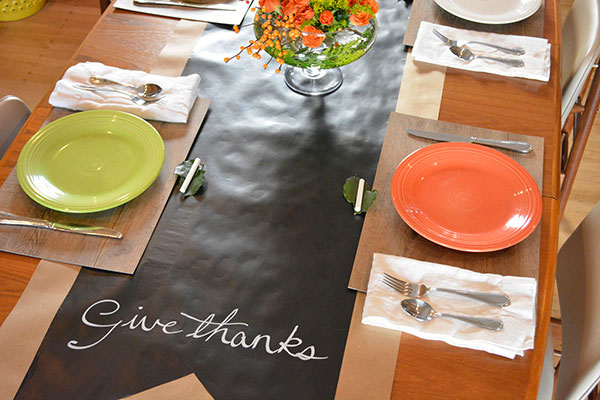
The holidays are fast approaching. What better way to host a festive event than with a writable surface at the dinner table? No need to spend a lot of money buying fancy Christmas tablecloths – a basic chalkboard paper roll will do the trick!

Not only is this an easy way to keep kids entertained, but a chalkboard table runner makes it simple to create seating assignments, label dishes or drinks. Of course, it is also an inexpensive way to design a one-of-a-kind centerpiece. Plus, is both decorative and functional at the same time.

Guests will remember the fun, creative decor. At the same time, you will not have to spend much money, time or effort putting it into place. That’s what the holidays are about anyways; having fun and creating great memories, right?

Using Chalkboard Contact Paper

Chalkboard Contact Paper
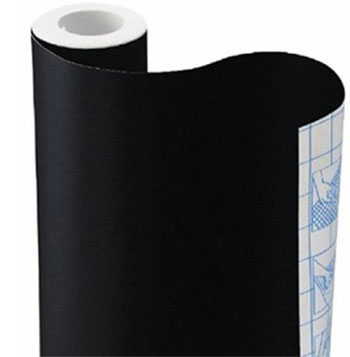
The great thing about this DIY project is that a single roll of chalkboard contact paper is typically about 6 – 6 1/2 feet in length. This is usually plenty long enough for a dinner table, so only one roll is needed to create 1 continuous runner.

Rolls are generally 18″ wide, so if you want a wider writing surface – or have 2 separate panels that run down each side of the table under plates – or prefer to cover the entire surface like a “chalkboard tablecloth”, just get the amount you need.

Many packages cost under $10 but if you shop around a little, you can find them for under $7. Another cost-saving feature of chalkboard table runners is that they sometimes can be re-used (or you can keep the scribbles and drawings as a memory of your fun evening with friends and family).

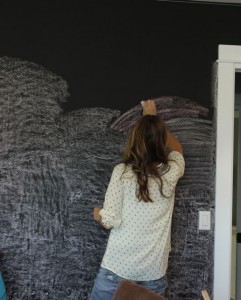
Although the contact paper is the cheapest option, another way to do this is to paint a sheet of vinyl. Although this costs more and is more time consuming, it allows you to use tint-able chalkboard paint and therefore make a green or red table runner (or any color for that matter). I’d start at the remnant section of your local fabric store to see if you can find a cheap piece. Here’s how to do it yourself.

Chalk

Chalkboard Colored Pens

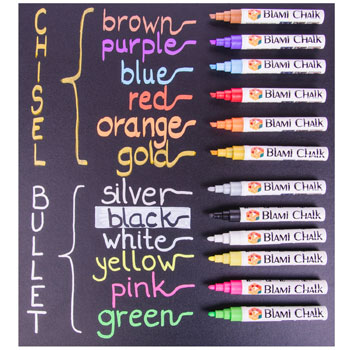
Now, if you are going with a colorful surface, you may not want colored chalk. However, if you are using a black table runner, a set of liquid chalk markers are a lot more fun and festive.

They will probably cost more than $10, but you can use them multiple times on lots of different occasions. They are also great for making labels for containers in the pantry, office, etc..

Chalk Cloth

Now, if you want to take your DIY project a step further with a more long-lasting runner, consider chalk cloth (yes there is such a thing!) The video below explains how to do it:


Make Your Own Chalkboard Wall: 6 Steps

Chalkboard Wall
Chalkboard Wall
courtesy of https://www.decoist.com

What if you don’t want to paint your fridge like a chalkboard? I mean, maybe your refrigerator is beautiful like it is.

That’s OK, because there are plenty of other things you can paint to be a chalkboard – or a white board or that matter.

I must say, I do like walls because they are pretty easy to paint. Plus, you can use a chalkboard wall to display notes, scribbles or art sometimes, and other times you can use it as a a plain black wall. (Or you can make another color for that matter.)

Plus, you can paint an entire wall, and sometimes a bigger blackboard is better than a small one.

How to Make a Chalkboard Wall

Just like the appliances, labels and other items, you just need chalkboard paint. Now, if you want your wall to be magnetic (cool for kids or offices), you’ll want to apply magnetic primer first, before the chalkboard paint itself. Get complete painting instructions here.

Before the primer, or even before taping off the edges of where you want your chalkboard to be, you want to make sure your painting surface is smooth and clean. If your wall is textured, that’s not good for chalkboards. You’ll want to sand it and wipe it clean of dust prior to painting. An electric hand/palm sander comes in great for the project. You can get one from stores like Home Depot for about $50 or less.

Tip: if you have a vacuum with a wand extension, this can be great for sucking up excess dust on the wall.

Of course before sanding, you want to remove any nails and fill in any holes with spackle or putty. Hmm. I feel like I’m giving your instructions in the wrong order. Oh well, there aren’t that many steps.

Priming Chalkboard Wall
courtesy of https://thepleatedpoppy.com

Here are the steps in the right order =)

  1. Remove nails, tacks, etc
  2. Sand wall surface, wipe off dust
  3. Tape edges of painting area
  4. Paint with magnetic primer, let dry completely
  5. Paint with chalkboard paint, let dry completely
  6. Prime your board by covering the entire wall with chalk. Yes this is time consuming, but works fastest when you use large chalk and lay it on its side to make large swipes along the board surface. After you are done, wipe the surface with a clean dry cloth.

Note: Keep in mind that you can paint your chalkboard wall any color you like, with tinted chalkboard paint, that is. You can also make your own chalkboard paint with inexpensive ingredients (it’s easier than you think) and use whatever color paint you like.
 

Weekly Menu Chalkboard – What’s Best for Meal Planning?

Weekly Menu Chalkfor for the Kitchen Fridge

Do you want an easy way to plan family meals throughout the week? This erasable (and reusable) weekly menu chalkboard makes meal planning easy, plus it comes with a monthly calendar!

Weekly Menu Chalkboard for the Kitchen Fridge

Advantages of this Meal Planner Chalkboard:

The menu board has ample space for daily meals, and it also provides room for a grocery list and notes. In addition, it comes with colorful chalk markers and an eraser.

Furthermore, everything sticks to the fridge magnetically so you can easily find it. Not to mention, you don’t have to find a spot on the wall to hang a chalkboard.

However, this meal planning kit comes with more than just a weekly menu template. It also includes a monthly calendar. Therefore, you can use it for different activities or plan further into the future.

Kitchen Menu Board and Monthly Calendar for Family Planning, Scheduling on Fridge

How Does this Magnetic Meal Planner Compare to Others?

Compared to other chalkboard menu decals, you get more for your money with this 2-for-1 package deal. Plus, you get the markers, erasers, spray bottle and re-usable stickers.

In other words, you get everything you need in one kit without having to purchase extra items. In my opinion, this is an impressive deal for under $20.

Fridge Chalkboard Menu Comparison

On top of that, the chalkboard is twice as thick, making it more magnetic. This feature is important, especially when used on vertical swinging doors. I mean, we don’t want our calendars slipping around, right?

Calendar and Menu Template Dimensions for Magnetic Fridge DecalsIn addition, the board surface has an upgraded laminate coating. As a result, the finish cleans more easily and lasts longer.

You might have also noticed that the menu and calendar boxes provide a good amount of space for writing. The template almost goes to the edge of the board, plus the fine lines maximize the writeable area.

Plus, using a pre-printed template makes meal planning much easier and better organized. Creating your own DIY chalkboard menu can be fun, however, it does involve more work.

What Comes in the Menu/Calendar Kit:

  1. Weekly Menu Planner (11″ Wide x 17″ Tall)
  2. Monthly Calendar (17″ Wide x 11″ Tall)
  3. 5 Liquid Chalk Markers (different colors)
  4. Magnetic Eraser
  5. Empty Spray Bottle
  6. Sheet of 30 Reusable Icon Stickers

    Chalkboard Fridge Calendar and Menu Set Features and Accessories

    Together, these 2 chalkboard planners make it easy to schedule family meals, appointments and reminders throughout the month. Alternatively, you can use them to plan homework, chores, achieve fitness goals or other important activities.

    In any case, these refrigerator chalkboards provide an easy and effective communication spot for busy families. You can stay organized, be more productive in a fun, convenient way.

    Note: Plus, you get to “wipe the slate clean” each week or month. Plan the next month’s upcoming activities and the weekly menu without having to buy more calendars. What a great way to save money! =)

    The Easy Way to Clean Your Chalkboard Menu:

    Conveniently, this kit comes with a spray bottle plus a magnetic white board eraser. Simply fill the sprayer with water, spray your chalkboard and wipe it clean.

    These chalkboards (or black dry erase boards) have a unique friction laminated surface that prevents chalk/pens from leaving remnant marks on the surface. Therefore, cleaning is fast and easy. Plus, your menu and calendar always have a fresh, clean look.

    Specs for the Weekly Menu Chalkboard Set:

    • Includes Both Monthly Calendar & Weekly Menu
    • Dimensions: 17″ Tall x 11″ Wide
    • Weight: 13 ounces
    • Color: Black
    • Magnetic
    • Brand: Lushleaf Designs
    • Made in the USA
    • For Sale: Where to Buy the Chalkboard Meal Planner

SALE

Large Vinyl Chalkboard Wall Decal for Kitchens, Kids Rooms, School Classrooms, Making Labels and more

Create an Easy Chalkboard Wall for Under $15 $10?

7-Foot Long Chalkboard Wall Sticker to Write, Draw, Create Calendars & More. Cut to Size. Great for Kitchens, Kids, School, Labels. Get it Now.

BUY