DIY Chalkboard Refrigerator Panels…. Made Easy

Roll of Peel and Stick Chalkboard Decal for Walls

Another way to create a custom look to your fridge is to add refrigerator door panels. However, refrigerator panels are usually expensive to buy, and often need to be custom made.

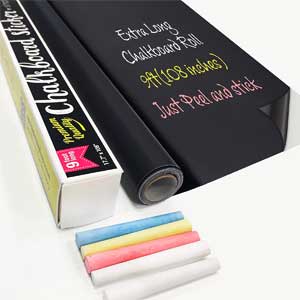
Instead, try the easy and inexpensive DIY method using vinyl chalkboard panels that stick in place. Plus, you can quickly remove them without damaging the surface of your fridge.

Do you have an old fridge that you are simply trying to hide? You may find that adding custom panels costs more than the fridge itself.

The Solution to Expensive Refrigerator Door Panels:

Magnetic Chalkboard Fridge Panels
courtesy of https://www.bobvila.com

Recently though, we’ve seen lots of DIY refrigerator door panels that are really cool-looking and easy to make. They don’t cost a lot in materials, and you don’t have to be a skilled craftsperson either. Some match the surrounding cabinets while others don’t. Of course, some include handy chalkboard panels.

There are several ways that you can go about this project, and it may involve some experimentation if you’re up for it. The panels you create will depend on the shape of your refrigerator doors, how you want the doors to look and whether or not you want them to match the rest of your kitchen. We’ve provided some ideas below.

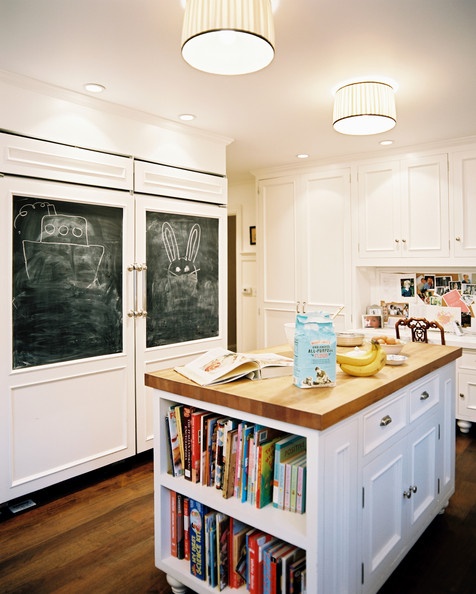
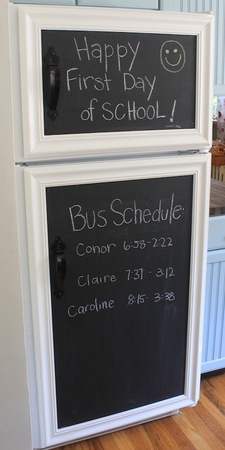
How to Make Fridge Door Panels as Shown Above.

This is simply a white fridge with 2 chalkboard panels attached with heavy duty magnets. You can get magnets that screw into your chalkboard panels. Then stick securely to your appliance so you don’t have to worry about it moving when you open the door.

Get a thin sheet of plywood. Frame it with molding and paint the frame to match the color of your fridge. On the other hand, if you want your refrigerator to be a different color, paint everything. Also remember to remove any handles if necessary before attaching the panels.

As you can see, this project didn’t involve trying to conceal the fridge or match it to the cabinets (which are blue). However, it looks fresh and new and creates a cozy feel in the kitchen where it might otherwise have just looked like a dull, old appliance taking up space.

A nice bonus to this option is that it is not permanent.

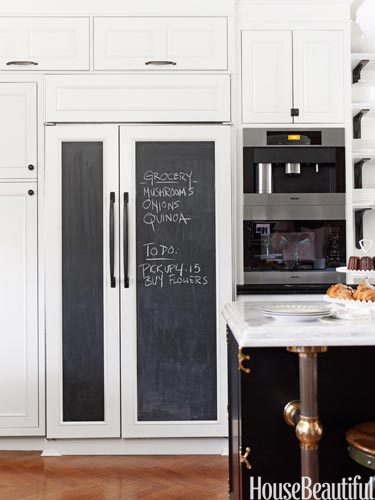
Sophisticated Fridge Panel Project… Made Simple

Custom Paneled Refrigerator
courtesy of https://katiemxoxo.blogspot.com

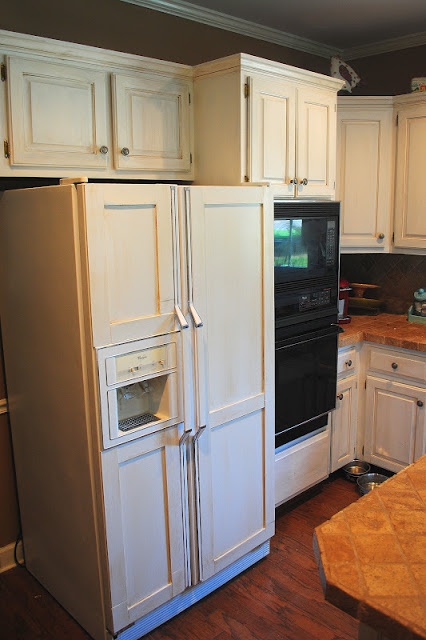
In this next example, you’ll notice that they added panels to the front. That said, they left the handles intact and simply worked around them (and the ice/water dispenser). Although it’s not completely hidden within the other cabinetry, this simple project gives it a custom look that makes it stand out less.

What they actually did here is quite crafty. They only added the panel frames and then painted the entire fridge 1 color. Less materials means a less expensive project. However, it may require more patience and skill to make it come out looking good. When doing this, it’s a good idea to add a bead of caulk along the inside seam of the frame where it touches the door so that it looks like it’s all one piece.

Another option is to paint the door within the frames with chalkboard paint (in any color, of course). If you wanted to go really crazy, you could make it a 4-color refrigerator!

How to Conceal Your Fridge Using Panels

White Refrigerator Door Panels
courtesy of https://www.pinterest.com

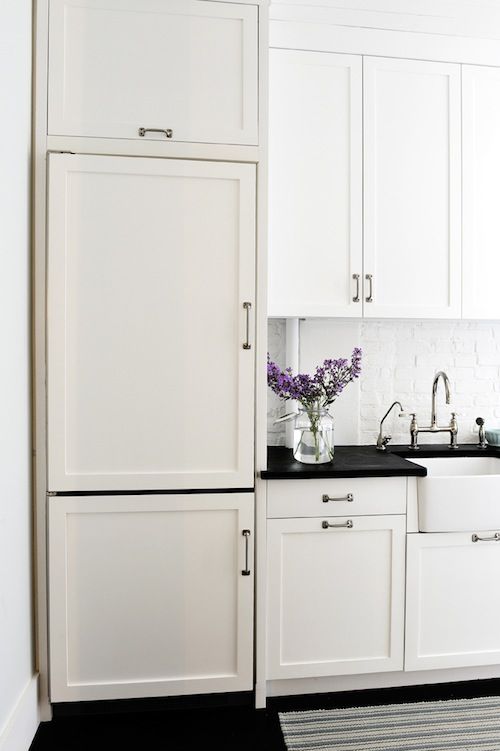
Do you have a smaller appliance or counter-depth fridge? You can more easily add door panels with matching cabinetry handles to fit in with the rest or your kitchen.

As you can see, the panels are extremely simple. You could make them using the techniques described above.

The matching kitchen hardware is key to making it look custom-made. Plus, you can fool your friends when they are trying to find a glass of juice.

Remember, these panels can also be painted with tinted chalkboard paint if you want. It will still look like a cabinet door.

Using Wallpaper on a Fridge?

Wallpaper-Covered Fridge Doors
courtesy of https://diy.roomzaar.com

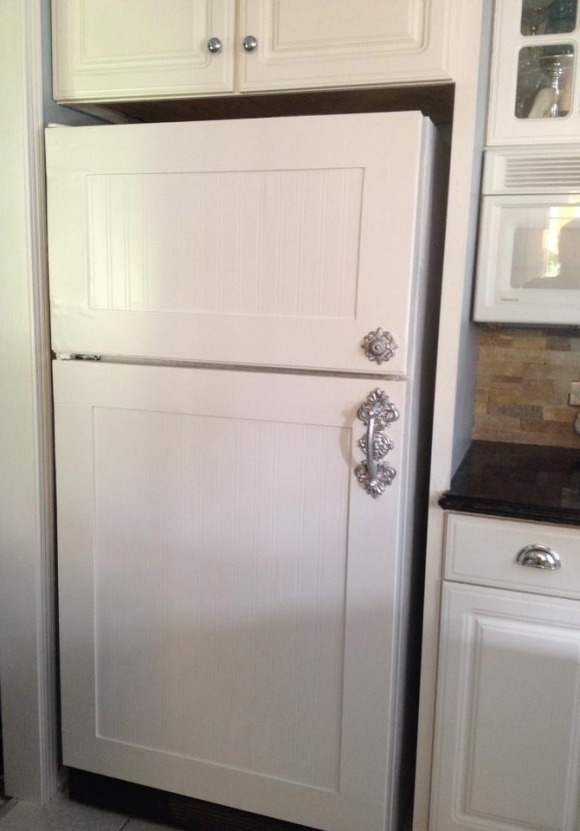
Check this one out. It’s got wallpaper on it. Yes, wallpaper.

The owner created the door panel frames and attached them to the doors over beadboard wallpaper.

You can use this simple and inexpensive technique to transform an entire kitchen without having to pay for a costly remodel.

It’s brilliant!

The door handles were actually purchased at a craft store and then spray painted silver, another cheap option to regular hardware.

courtesy of https://theoldpaintedcottage.com

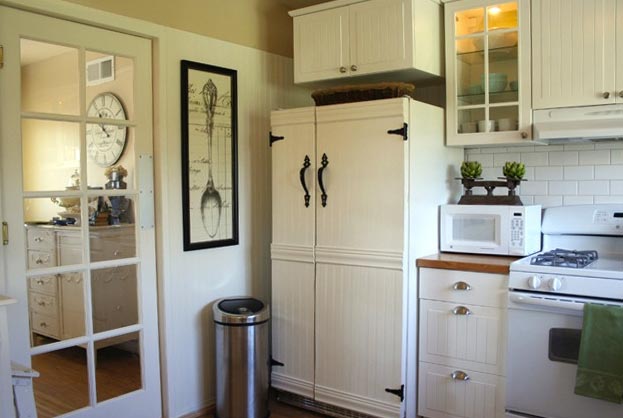
In this example, the owner used actually beadboard and attached the panels to the doors with a hot glue gun. Although the hardware doesn’t match the rest of the existing kitchen, the farm-style look fits right in with the rest of the decor – and once again, it fools the eye into thinking it is yet another storage cabinet.

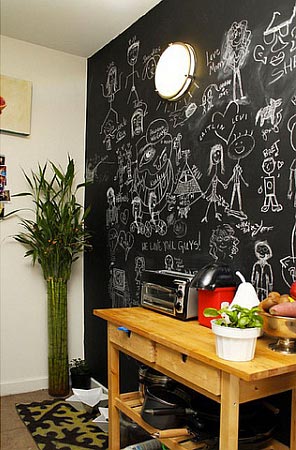
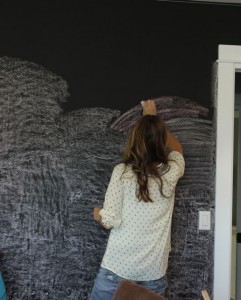
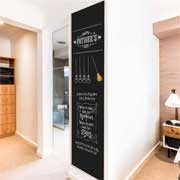
Photos/Ideas Using Chalkboard Refrigerator Panels:

Chalkboard Fridge Panels
courtesy of https://www.lonny.com
Chalkboard Painted Fridge Panels
from https://www.housebeautiful.com
Refrigerator Chalkboard Panels
courtesy of https://s693.photobucket.com/user/theliebertfamily/

How to Make an Easy Chalkboard Table Runner for $7

Chalkboard Table Runner

Chalkboard Table Runner
courtesy of https://www.essexapartmenthomes.com

The holidays are fast approaching. What better way to host a festive event than with a writable surface at the dinner table? No need to spend a lot of money buying fancy Christmas tablecloths – a basic chalkboard paper roll will do the trick!

Not only is this an easy way to keep kids entertained, but a chalkboard table runner makes it simple to create seating assignments, label dishes or drinks. Of course, it is also an inexpensive way to design a one-of-a-kind centerpiece. Plus, is both decorative and functional at the same time.

Guests will remember the fun, creative decor. At the same time, you will not have to spend much money, time or effort putting it into place. That’s what the holidays are about anyways; having fun and creating great memories, right?

Using Chalkboard Contact Paper

Chalkboard Contact PaperThe great thing about this DIY project is that a single roll of chalkboard contact paper is typically about 6 – 6 1/2 feet in length. This is usually plenty long enough for a dinner table, so only one roll is needed to create 1 continuous runner.

Rolls are generally 18″ wide, so if you want a wider writing surface – or have 2 separate panels that run down each side of the table under plates – or prefer to cover the entire surface like a “chalkboard tablecloth”, just get the amount you need.

Many packages cost under $10 but if you shop around a little, you can find them for under $7. Another cost-saving feature of chalkboard table runners is that they sometimes can be re-used (or you can keep the scribbles and drawings as a memory of your fun evening with friends and family).

Although the contact paper is the cheapest option, another way to do this is to paint a sheet of vinyl. Although this costs more and is more time consuming, it allows you to use tint-able chalkboard paint and therefore make a green or red table runner (or any color for that matter). I’d start at the remnant section of your local fabric store to see if you can find a cheap piece. Here’s how to do it yourself.

Chalk

Chalkboard Colored Pens

Now, if you are going with a colorful surface, you may not want colored chalk. However, if you are using a black table runner, a set of liquid chalk markers are a lot more fun and festive.

They will probably cost more than $10, but you can use them multiple times on lots of different occasions. They are also great for making labels for containers in the pantry, office, etc..

Chalk Cloth

Now, if you want to take your DIY project a step further with a more long-lasting runner, consider chalk cloth (yes there is such a thing!) The video below explains how to do it:


Make Your Own Chalkboard Wall: 6 Steps

Chalkboard Wall

Chalkboard Wall
courtesy of https://www.decoist.com

What if you don’t want to paint your fridge like a chalkboard? I mean, maybe your refrigerator is beautiful like it is.

That’s OK, because there are plenty of other things you can paint to be a chalkboard – or a white board or that matter.

I must say, I do like walls because they are pretty easy to paint. Plus, you can use a chalkboard wall to display notes, scribbles or art sometimes, and other times you can use it as a a plain black wall. (Or you can make another color for that matter.)

Plus, you can paint an entire wall, and sometimes a bigger blackboard is better than a small one.

How to Make a Chalkboard Wall

Just like the appliances, labels and other items, you just need chalkboard paint. Now, if you want your wall to be magnetic (cool for kids or offices), you’ll want to apply magnetic primer first, before the chalkboard paint itself. Get complete painting instructions here.

Before the primer, or even before taping off the edges of where you want your chalkboard to be, you want to make sure your painting surface is smooth and clean. If your wall is textured, that’s not good for chalkboards. You’ll want to sand it and wipe it clean of dust prior to painting. An electric hand/palm sander comes in great for the project. You can get one from stores like Home Depot for about $50 or less.

Tip: if you have a vacuum with a wand extension, this can be great for sucking up excess dust on the wall.

Of course before sanding, you want to remove any nails and fill in any holes with spackle or putty. Hmm. I feel like I’m giving your instructions in the wrong order. Oh well, there aren’t that many steps.

Priming Chalkboard Wall
courtesy of https://thepleatedpoppy.com

Here are the steps in the right order =)

  1. Remove nails, tacks, etc
  2. Sand wall surface, wipe off dust
  3. Tape edges of painting area
  4. Paint with magnetic primer, let dry completely
  5. Paint with chalkboard paint, let dry completely
  6. Prime your board by covering the entire wall with chalk. Yes this is time consuming, but works fastest when you use large chalk and lay it on its side to make large swipes along the board surface. After you are done, wipe the surface with a clean dry cloth.

Note: Keep in mind that you can paint your chalkboard wall any color you like, with tinted chalkboard paint, that is. You can also make your own chalkboard paint with inexpensive ingredients (it’s easier than you think) and use whatever color paint you like.
 

SALE

Large Vinyl Chalkboard Wall Decal for Kitchens, Kids Rooms, School Classrooms, Making Labels and more

Create an Easy Chalkboard Wall for Under $15 $10?

7-Foot Long Chalkboard Wall Sticker to Write, Draw, Create Calendars & More. Cut to Size. Great for Kitchens, Kids, School, Labels. Get it Now.

BUY