Painting Appliances: Step-by-Step Tips 1-2-3

dishwasher

dishwasher
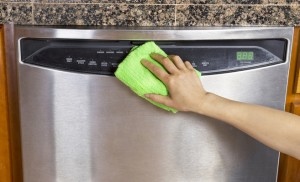
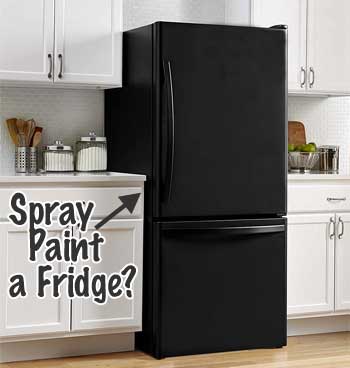
Painting appliances can be an inexpensive way to transform an ugly kitchen into a stylish and sophisticated space. Instead of buying new equipment or re-facing a dishwasher or fridge, why not use a stainless steel paint kit?

You can save a bunch of money, while still achieving an upgraded, professional look.

You can either paint your appliances to match and blend in with the surrounding kitchen cabinetry or you can paint them to match each other but stand out from the rest of the kitchen (ie stainless steel look). You can also paint your washing machine and dryer and brighten up a dull laundry room!

Painting Appliances - How to Spray Paint a Fridge with Epoxy Spraypaint

What Type of Appliance Paint Should You Use?

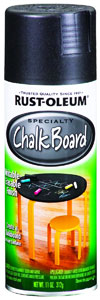
Get special appliance paint because it bonds better. It’s also super durable and is designed to resist scratches, etc..

Epoxy paint comes in variety of different colors. (You can even use it to refresh you washer/dryer set in your laundry room.)

You will also be able to wash it – a must for a well-used appliance. Remember – you don’t want it to look like you painted it!

Cheap Stainless Steel RefrigeratorIf you are painting something where the surface gets hot, like a stovetop or oven, you will want to use heat resistant paint. You can even get a liquid stainless steel stove & dishwasher kit if you want to match them to a stainless steel fridge.

You can get either spray paint or brush-on paint, but the spray type will give you a smoother finish and look more professional. Get the brush-on type to fix dings if necessary.

Prep Work Before You Begin Painting Appliances:

Do all preparation beforehand for a great looking finish. This means cleaning the item’s surface with acetone or alcohol and lightly sanding rust areas if necessary. Appliance paint is more forgiving than regular paint because of it’s thickness, so some minor scratches that you have may simply disappear. (Sweet!)

Note: Use multiple light coats for best coverage, so make sure to get enough cans. This, of course will depend on how much painting you will be doing. (a 12 oz can of epoxy spray paint generally covers up to 15 square feet).

What About Appliance Handles and Hardware?

Probably the easiest way to deal with appliance hardware is to remove it. Tape around it and cover it if you can’t. In some cases, you can leave the handles unpainted and they look perfectly fine. In other situations, you may want to paint them to match. In either case, I would remove them before painting.

The finished look of freshly painted appliances is really impressive. If you are trying to sell your home or rent it out, this will definitely make an impression on potential buyers or renters. If you simply want to enjoy your “new” kitchen for yourself, you will because your appliances will look amazing and you will have saved tons of money!

How to Make a Chalkboard Table

saw horse desk

Chalkboard tables are super easy and inexpensive to make. Virtually any table can be converted to a chalkboard with chalkboard paint – or you can build a table from scratch.

My chalkboard table does double-duty as a coffee table and a to-do list. I work from home, so this is a great way to organize my projects and keep me focused. I can also doodle if I feel like it.

Chalkboard tables are also great for kids and families. You can write messages on them, play games or bring out your inner artist. They can be used as coffee tables, sawhorse tables or desks, craft areas or even your kitchen dining table.

How to Make a Sawhorse Chalkboard Desk

Saw Horse Desk: How to Make a Chalkboard TableAs far as large tables go, a sawhorse table is about the easiest and most versatile table you can make. The reason is that you can take it apart and move it around easily (with a hollow core door).

All you need is a door and a pair of sawhorses. Alternatively, you can make your own sawhorses with a set of sawhorse brackets and 2×4’s. Making your own sawhorses of course takes more time and effort, but there is an added benefit….

You can change out your sawhorse legs to make your table different heights. For example, standard table height, standing desk/bar table height and coffee table height. You only need one door, but you can switch out the legs when you need tables for different purposes without having to make an entirely new table.

And if that wasn’t enough, you can add a couple of 2×4’s underneath one length of the door to create a tilt in the desk surface.

Buy or Make Sawhorse Table Legs

There are several options when it comes to sawhorses. You can go with metal, wood or heavy duty plastic. Most are designed to carry a heavy load, so your choice really comes down to how much you want to spend and the look you want to create with your table.

My special, super-secret technique for sawhorse legs:

I make my sawhorse legs with 2×4’s and brackets. I cut the 2×4’s to size, do a light sanding and seal with either a clear varnish or stain. Not much to it.

The height measurements I use:

– For a standing desk I cut 2×4’s to 36″, which gives me a table height of about 40″
– For a standard table I cut 2×4’s to 26″, which gives me a table height of about 30″


Stanley 060864R Folding Sawhorse (2-Pack)


Fulton D300 Sawhorse Bracket


Stanley 60622 Folding Adjustable Sawhorse (2-Pack)

Chalkboard Painting Tips

I made the mistake of painting my homemade chalkboard table when it was cold. I then proceeded to paint with a roller instead of a brush. The result was thick, clumpy paint and a very textured door. Not ideal for drawing on.

The solution was fixable, but time consuming. I had to sand down the entire door and re-paint with a brush. My chalkboard table is still not entirely smooth, but it works.

By the way, I painted the reverse side of my door table and the door edges with regular black spray paint. I used gloss because that’s what I had, but I think flat paint would work just fine.

My suggestions are to:

– Not paint on a cold day
– Paint with a brush
– Make sure your painting surface is clean and smooth.
– Chalkboard Art – How to Do It

…Or Buy a Chalkboard Table

OK. I get it. You want a chalkboard table, but you don’t want to make it yourself. I’m fine with that. It takes time, and your first try may not look as good as the one you can buy at the store. Here is a cool one that you can buy – and it doesn’t cost a lot of money either. =)

Chalkboard Table Plans:


TIP: Did you know that you can actually make your own chalkboard paint using regular latex paint and powdered, non-sanded tile grout? Get more information here.

Chalkboard Labels: 3 Ways to Make Them

chalkboard labels

Chalkboards have moved beyond the classroom wall. In fact, these handy writing surfaces are really convenient for people who like to stay organized.

Chalkboard labels (or chalkboard stickers) seem to be all the rage right now, and they are easy and cheap to make. Not to mention, they look super cool too. By the end of this article, you will not only know where to buy these stickers, but you will know how to make chalkboard labels as well.

Check out these containers below:

chalkboard labels

Of course, you can buy pre-made labels and make the job easy (or they make a great gift too!), or you can make your own for cheap.

1. Punch Out Your Labels

Handheld Portable Chalkboard Label PunchOne way to make your labels is with adhesive chalkboard paper and a hole punch. Typically, chalkboard paper comes in large rolls, so be prepared to spend about $8-10 on this, but you will be able to make a bunch of labels.

Hole punches come in a variety of shapes and sizes, some perfect for making labels. They make the job quick and fun, and you can get some pretty cool looking designs, like scalloped or wavy edges, that might be difficult to cut yourself. These run about $15-10.

Can of Rustoleum Black Chalkboard Spray Paint

2. Paint Your Chalkboard Labels

Another simple way to make your labels is to simply buy some rectangular mailing labels at your local stationary store and paint them with chalkboard paint.

Spray paint is easy to use and leaves a really smooth finish, but you can also get a can of paint and brush it on.

When the paint dries, the labels are all ready to peel off their backing and stick on your jars, buckets, tubs and other containers.

3. Use a Label Template

chalkboard label template
courtesy of https://www.fun-stuff-to-do.com

If you don’t want all of your labels to look identical, and you are willing to spend a little more time creating them, you can download a free template and cut out your own stickers like the one on the right. Cut out the template and then trace it one the labels or adhesive paper you are using.

The scalloped edges edges can be challenging, but the simpler designs are a lot easier. Using this technique, it’s easier to outline and cut the designs first, and then paint them – unless you are using chalkboard contact paper.

Writing on Your Labels:

With small labels, liquid chalk markers are a lot easier to use than regular chalk (especially on chalkboard labels for jars). They look cleaner, and with a finer tip they allow you to write more if you need to.

Colored Chalkboard Labels:

And don’t forget that your labels don’t need to be black! You can get tint-able chalkboard paint (or make your own) and choose any color you want. Keep in mind that you may want to select a bright or dark color so that the chalk shows up!

SALE

Large Vinyl Chalkboard Wall Decal for Kitchens, Kids Rooms, School Classrooms, Making Labels and more

Create an Easy Chalkboard Wall for Under $15 $10?

7-Foot Long Chalkboard Wall Sticker to Write, Draw, Create Calendars & More. Cut to Size. Great for Kitchens, Kids, School, Labels. Get it Now.

BUY