A Chalkboard Calendar… Fridge?

fridge peel-and-stick calendar

fridgecalendar

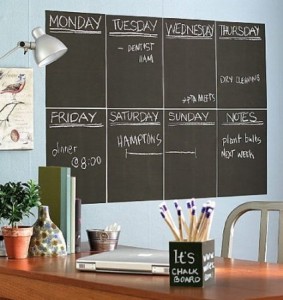
A great way to use your chalkboard fridge is… as a giant calendar. You can also buy a magnetic chalkboard calendar to stick on your refrigerator.

Not only can you erase it each month, it gives you lots of space to write. It’s also right in front of your face – perfect for meal planning or a diet too!

Using colored liquid chalk markers can help you categorize different types of activities within your calendar, so that you can easily locate the information you need. Colors also make it more fun!

A fridge calendar can also serve as a large message board for family members. Everyone can see it, so they know what’s going on. Plus, each person can add to it, making it easier to coordinate.

There are several ways you can create your chalkboard calendar.

Option #1:

First, you can paint your entire refrigerator and simply outline the area you want to use with chalk. This gives you maximum space.

chalkboard calendarOption #2:

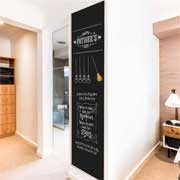
Second, you can apply plain magnetic or vinyl peel and stick chalkboard fridge decals to your refrigerator door (or side if accessible). These are removable rather than permanent, and you can get them in several different sizes.

Depending on how big you want your calendar, you could get a single decal that measures about 25″ by 38″ or you could get several smaller squares and align them together.

Since they are plain black decals, it you decide to use them for something else besides a calendar down the road… no problem.

Magnetic Chalkboard CalendarOption #3:

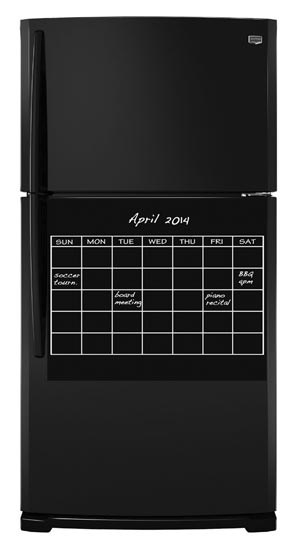
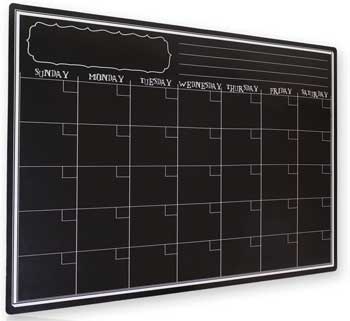
Third, you can get a pre-made peel-and-stick vinyl chalkboard calendar kit. These kits come with pre-marked days that you simply set-up for the particular month. They are clean-looking and actually really inexpensive (about $20-30). For this price, you could even use one as a menu calendar and another in your home office for scheduling.

Size measurements are about 17″ wide by 12″ high, so make sure your fridge door can accommodate the calendar.

“Remodel” Your Fridge with Wallpops Decals! ( BLOX )

Vinyl Zebra Decals on Wall

Colorful Fridge Wallpops DecalsHere’s a crazy (and cool) ideas for re-styling your kitchen refrigerator. Designer BLOX Wallpops Decals.

Yes, that’s right – the image on the left that you see is actually a peel-and-stick tile that adds instant art to your refrigerator without paint.

It’s almost like wallpapering your fridge with your favorite design – but being able to peel it off if you want to. Peel-and-stick decals also make your decorating project a breeze because they are so easy to work with.

Are Decals Better than Paint for Remodeling a Fridge?

We talk so much about painting a fridge with chalkboard paint so that you can draw beautiful or funky artwork – but why not add the “artwork” to begin with so that you don’t have to create it yourself? This makes it so much easier for those of us who are not so good with chalk.

Peel-and-Stick WallPops Blox DecalYou don’t have to be patient, as you would when working with paint. You also don’t have to worry about getting “bubbles”, a common issue with applying wallpaper. Just peel back a decal and re-position it if needed. It can’t get much simpler.

As you can see, you can mix and match tiles too. This creates a custom look and makes it easier to incorporate all of the colors that you want so that your fridge fits in better with the rest of your kitchen (or stands out!).

You Can Use Wallpops Decals for More than Just Your Refrigerator!

Vinyl Zebra Decals on WallYou’ve probably seen these removable decals advertised for use on walls – as a form of wall art above a sofa or bed. However, now people are using them (and cutting them to size) to fit their refrigerators (think floor tiles).

WallPops Blox now has several designs coming out in tiled squares. Hence, they fit well side-by-side and look really great on square or rectangular appliances, such as fridge. They can be cut easily to the size and shape you want with a pair of kitchen scissors or box knife. Therefore, can create narrow rectangular panels to create a peel-and-stick “frame”.

Now, they aren’t as cheap as using a can of paint. However, they are a lot easier, less messy and for some people – more fun. Plus, if you don’t want something permanent, this is a good option.

Modern Decal with CirclesIn addition to covering your entire fridge in these decorative decals, you can also mix and match designs with solid colored tiles. Look for patterns that can be positioned either vertically or horizontally. This gives you more versatility in your design.

You might decide to cover only the door. Alternatively, you could simply add one vertical or horizontal panel.

In other words, you have lots of choices. Of course, you can play around with the panels you get to find a configuration you like, since they are removable. Check out this video below to get easy instructions on how to make your fridge look fabulous:


Click here to see more fridge decals

How to Distress Paint a Fridge in 3 Steps

Refrigerator with Distress-Painted Panels

50 Ways to Paint FurnitureIf you are into DIY home decorating, you’ve probably heard of distressing furniture to give a cool, shabby chic look without a lot of effort. In fact, this painting technique doesn’t require any know-how, and you need very few supplies to complete a project.

In essence, you can easily transform an old, ugly piece of furniture into something you love without spending a lot of money. And, believe it or not, the same idea works on refrigerators. Really.

As with other fridge painting jobs, you can choose to make your appliance stand out – or match the surrounding cabinets (like the photo below).

Refrigerator with Distress-Painted Panels
courtesy of https://www.aegive.com

A Simple Trick to Saving Money:

And since kitchen cupboards are typically constructed of wood, you will probably need door panels for your refrigerator that will match your cabinetry. However, don’t think that you need to hire a contractor to build them for you or pay high prices to have them custom made.

Many kitchen cupboards have a simple design that can can be replicated more easily than you might think. Check out this page to see lots of examples and get instructions on how to do it yourself very inexpensively.

Make Mistakes:

The distressed look is meant to look worn and weathered. Therefore, you can make plenty of mistakes on your projects without worrying about how it will look. The naturally imperfect look that you are trying to achieve through distressed painting might even turn out better when you don’t have any idea what you are doing.

Look at the next photo. This distressed fridge is impressive, even though it has plenty of imperfections. Note the unique handles, that were most likely added to create a more sophisticated look.

Distress-Painted Fridge: How to Distress Paint
courtesy of https://www.pinterest.com

Step 1: Learn the Distressed Paint Technique

If you think that this look would work well in your kitchen, the first step to learn more about how to create a distressed look with paint. The video below shows a good example.

Distressing technique with chalk paint:


Give Distressed Furniture a Finished Look w/ Beeswax

Step 2: Find Out How to Make Door Panels

The second step is to figure out the door panelling you need. You may not need any at all. This blog has very helpful instructions and photos on making diy refrigerator panels. After seeing how it’s done, I was pretty impressed, especially with the final result.

Step 3: Get the Paint You Need

Although I love chalkboard paint, you don’t need to turn your distress-painted fridge into a chalkboard too. You may want to use chalk paint instead, which is virtually the same thing. Alternatively, you can use chalkboard paint and simply not write on it.

Chalk paint helps your painted surfaces appear naturally weathered, when using the distressed painting method. You aren’t limited by colors, and the paint is not expensive either. Get it at your local paint or home improvements store or order it online.

Information on Dry Brushing:

Dry brushing is another similar technique you can use to achieve the shabby chic or antique look on your fridge and/or kitchen cabinets. As you can see, the method is very simple. On top of that, if you feel like you made a mistake, you can easily brush over it to look…. naturally imperfect.

And when in doubt, I look for a Distressed Paint Kit.


50 Decorative Furniture Finishes: Step-by-Step

If you’re like me, you’ve probably got lots of chalk painting ideas floating around in your head already. Test out this style on a flower pot, picture frame or scrap piece of wood first if you want to practice. Then, jump in and get started. I bet you’ll be hooked!

SALE

Large Vinyl Chalkboard Wall Decal for Kitchens, Kids Rooms, School Classrooms, Making Labels and more

Create an Easy Chalkboard Wall for Under $15 $10?

7-Foot Long Chalkboard Wall Sticker to Write, Draw, Create Calendars & More. Cut to Size. Great for Kitchens, Kids, School, Labels. Get it Now.

BUY