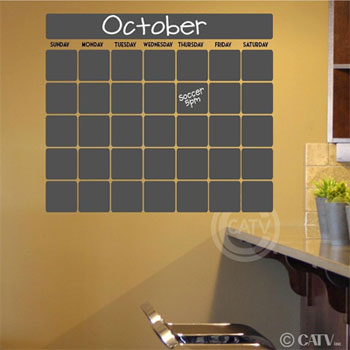
A chalkboard is a great surface for a calendar because you can write, erase and re-write as your schedule changes. Plus, at the end of the month, you can clear the entire board and use it again – month after month.
 Some families use a chalkboard calendar in the kitchen, where everyone can see it, add to it and make changes. These calendars also work well in offices where a group of people all use the same calendar.
But really, anyone can use chalkboard calendars, especially because (when done right) they can actually make your wall look really cool – not to mention functional.
They key is to turn it into a DIY project, and it doesn’t have to be hard or time consuming. Whether you paint the wall yourself using painter’s tape as a template or get a peel-and-stick decal kit or get a giant chalkboard calendar wall sticker – this do-it-yourself project can easily be done by anyone.
And yes, I mean anyone.
Chalkboard Vinyl Calendar Wall Decals
These kits come with easy-to-follow instructions. They basically involve sticking the vinyl decals to the wall (or door, mirror, refrigerator, etc.. Yes, it’s that easy. Not only that, but the decals can be applied to both smooth and textured surfaces and also can be removed without damaging the wall itself.
These calendars are not huge, so don’t assume that you’ll have lots of writing space. They typically run approximately 2 feet tall x 2 feet wide and cost about $30-40. Not bad for taking all of the work out of a DIY chalkboard project.
 But who says your wall calendar needs to be an entire month?
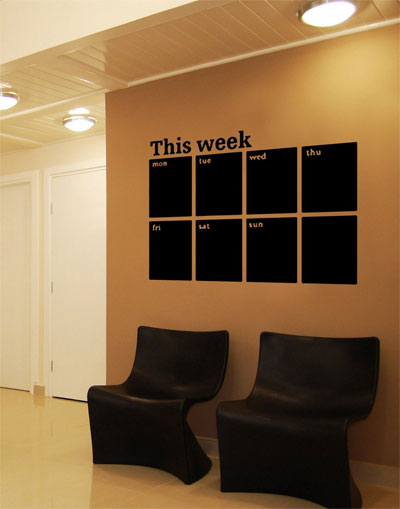
Sometimes that’s just too much information or you’d prefer less days with more writing space. Or you simply like the look of 7 squares. I mean 8.
This wall sticker package comes as a roll and may appear that it is a single sheet that you will then have to cut into pieces. However, it’s easier than you think. The package actually includes 8 “squares”, and the dimensions of each separate decal are approximately 7-1/4″ wide x 8-1/4″ tall. The “This Week” headline is also included.
Another option is to buy 4 of these weekly calendar packages and create a monthly wall “daytimer” that measures about 4 feet tall by 5 feet wide. Now there’s no need to decorate that blank wall you have in the house (or office) – the calendar has taken care of that job for you!
Depending on the package that you get, the total decal cost for this giant masterpiece will run between $80 and $120. Again, it’s a very inexpensive way to decorate a wall while also making it functional. Not to mention you can save money each year on buying wall calendars ;).
Paint Your Own Giant Wall Calendar:
The true do-it-yourself way to create a chalkboard calendar is by using paint. By using painters tape or Frog tape, you can create your template and then simply paint everything all at once. This makes it a lot easier and faster.
This video below shows how to do it, along with some tips and the completed look…
Keep in mind that when using paint, you have a lot more flexibility in the colors that you use (tint the paint any color you want). You also can use dry erase paint instead of chalkboard paint. This technique works best with smooth walls rather than textured.

