6 Ways to Clean Chalkboard Paint

Blackboard and chalk

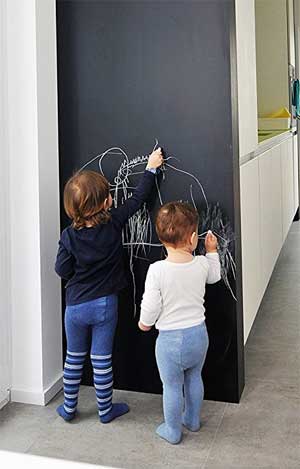
If you paint your fridge, wall or other surface with chalkboard paint, you probably want to know how to keep it looking clean and new. My favorite method is below in this video. I have also listed several other ideas below.

1. How to Clean Chalkboard Paint with a Chalkboard Cleaner:

Blackboard and Chalk: How to Clean Chalkboard Paint

First of all, there are cleaning products for blackboards. However, you don’t need to buy them. Instead, you can use a few simple techniques that others have learned over the years.

2. Clean Off Chalk with a Chalkboard Eraser:

Second, you can use a chalkboard eraser. Just make sure that it does not contain dust when you use it.

Simply clean your eraser after every use, either by rubbing them with a cloth or vacuuming them. By the way, you can save money on erasers by purchasing them in multi-packs. Plus, when you have more than one eraser, you don’t have to clean them as frequently. =)

3. Remove Chalk with a Microfiber Cloth:

How to Clean a Chalkboard with Microfiber Cloths

Third, use a dry, lint-free microfiber cloth. Microfiber material picks up dust and lint really well.

Just make sure to wash microfiber separately than other materials, and don’t put them in the dryer. (They’ll keep their dust-attracting charge longer).

Note: If you clean your board frequently, it’s best to use a dry cleaner. Using water over and over can damage the surface and over time lighten your board.

4. Add a Little Vinegar to Get a Chalkboard Really Clean:

Fourth, you can use a damp rag. However, instead of using plain water, add a small amount of vinegar to the water solution. The vinegar reacts with the calcium in the chalk and therefore leaves a cleaner surface. (Did you vinegar makes an effective natural weed killer too?)

cameron

5. Squeegee Your Chalkboard to Clean It:

Fifth, use a squeegee. You don’t need to spend a lot of money or buy anything fancy, (a $10 squeegee will work fine).

First, remove the majority of dust from your chalkboard first. Then, use a squeegee with water. (This technique will work best on larger boards that have smoother surfaces.)

6. Add Lemon Oil to Chalkboard for Extra Shine:

How to Use Lemon Oil to Make Your Chalkboard Clean and Shiny

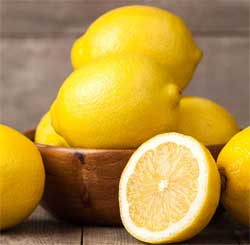
Sixth, add a few drops of lemon oil to make your chalkboard paint shine. If you want your board to look especially nice – either for an event or guests – add some lemon oil to a cloth and rub over the blackboard surface to create a more finished look.

As you can see, cleaning chalkboard paint, or a painted surface is not that difficult (and it can keep it looking fresh and crisp with minimal effort).

That said, keep in mind that chalkboard-painted walls or surfaces are meant to have that shabby-chic appeal, while looking weathered and worn. Therefore, don’t ever feel like you have to clean your chalkboard fridge at all (well maybe on the inside…)

How to Defrost a Mini Fridge in 60 Minutes

60 minute mini fridge defrost

Whether you have a chalkboard fridge or not – if you have a mini refrigerator, you will most likely need to defrost it at some point. Below are the steps on how to defrost your fridge quickly, and it’s surprisingly simple.

How to Defrost a Mini Fridge Fast:

How to Defrost a Mini Fridge or Compact Refrgerator in 60 Minutes or Less

1. Unplug your fridge.

2. Take all items out of your refrigerator and/or freezer and put them in a cooler with a lid. If you don’t have a cooler (or one big enough), you could unload everything into a bathtub.

3. Open the door/doors to your mini fridge and leave them open for 60 minutes. If you have a lot of frost buildup in the freezer, you may want to place a towel on the floor in front of the open door just in case the defrosting ice comes tumbling out.

4. Come back to your fridge in 60 minutes, and the ice should have started melting away. Then, you can gently (I said gently!) pull the ice away.

Note: Don’t try to stick a screwdriver in and wedge the ice out. This can wreck the sides of the appliance and then you’ll be angry! I sometimes use a rubber/silicone/plastic spatula if the ice needs a little “coaxing”.

5. If the ice is being difficult, use a warm wet washcloth to gently loosen up the ice. Ice is usually not difficult, especially if you are defrosting your mini fridge every 3-6 months.

6. Lastly, wipe down the sides and back with a high-absorbing dry cloth. In other words, remove as much moisture as you can. This will help prevent ice build up in mini fridge from starting right away.

Then, plug the refrigerator back in and reload it with all your food and drinks.

Some Tips for Easier/Faster Defrosting:

1. Defrost Your Fridge on a Warm Day:

Choose a warm and/or sunny day and move your fridge in the sun. A simple temperature change can work wonders, and your little appliance can defrost in as little as 30 minutes.

2. How to Keep Food/Drinks Cool While Defrosting:

Mini Fridge Freeer with 2 Separate Compartments

Does your compact appliance have 2 compartments (a refrigerator and separate freezer section)? Then, you can leave your food in the fridge and simply leave the door open to the freezer while defrosting.

If you have enough space, move the freezer items into the fridge. This maintain the chill while the fridge defrosts itself.

Alternatively, you can place all food and drink into an enclosed plastic cooler for an hour.

3. Defrost More Frequently to Make the Task Easier:

The more often you defrost the mini fridge, the less time it takes. Plus, less ice build-up makes removal easier too.

Defrosting a Mini Fridge is Easier than You Think.

Defrosting a Mini Fridge - Who Knew it Was So Easy?

Don’t be afraid of manual defrost appliances, because removing the ice is quick and easy once you get the hang of it.

When you do regularly-scheduled maintenance and have an easy system in place – it’s a snap. You can watch your favorite TV show while you’re doing it, make dinner – or even go to the grocery store to buy more food.

Will this Defrost Method Work on a Full-Size Refrigerator?

With a larger manual defrost refrigerator, you can apply this same strategy, but the process will take longer. I suggest two things:

  1. Don’t decide to start when you have a ton of frozen food. In other words, plan a time when your fridge isn’t full.
  2. Get a bag of ice for your cooler or bathtub before your begin your project. Therefore, you can give your appliance as much time as it needs to melt the frost.

More Tips on Keeping Food & Drinks Cold:

How to Make a Chalkboard Wall Without Paint 1-2-3

How to Make a Chalkboard Wall with Paint

What if you want to draw on your wall, but you don’t want to start a chalkboard painting project? Here’s how to make a chalkboard wall without paint – the easy way!

How to Make a Chalkboard Wall with PaintFirst, you’ll need extra-large chalkboard decals. They typically come in long narrow rolls, so they are simpler to work with.

These wall panels don’t cost a lot, and they’re actually easier to apply than standard wallpaper. Plus, you can simply cut them to size (with a knife or scissors) to custom-fit your space or even a door.

If you have a large wall, for example, you can buy multiple rolls and install them side-by side. Lay them against the wall from top to bottom and flatten them as you go.

Second, you’ll probably wall to have 2 people for the installation. In addition, there are a few supplies you want to have on hand (that you probably already have laying around the house).

Liquid Chalk Markers for Drawing on Chalkboard WallNote: These panels have a flat, matte finish, so they make your wall look like an authentic blackboard.

Plus, they work with liquid chalk markers (some chalkboard-painted surfaces don’t work with the markers).

How to Apply a Chalkboard Wall Decal:

How to Apply Chalkboard Wall Decal
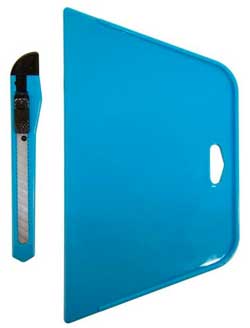
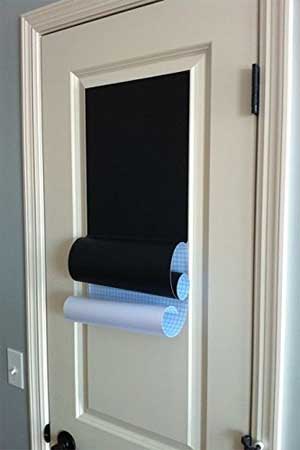
Just like other wall decals (and some wallpaper), you simply remove the backing and stick the vinyl chalkboard decal to the wall. That said, I’ve included some tips from the manufacturer.

First of all, you want to clean the wall surface of any dust or dirt. In addition, you want the surface to be flat rather than textured.

For example, this chalkboard sticker will work on glass, tile, metal, wood, smooth plastic and painted walls.

On the other hand, it will not work well on textured wallpaper or heavily-textured paint.

Smoother and Knife Set for Applying Chalkboard Wall DecalSecond, slowly peel the back sheet off and lay the decal on the wall starting at a top corner. (By the way, two people will have an easier time hanging the chalkboard decal than one.)

Press the sticker onto the wall and smooth out any bubbles as you go (demonstrated in the video below). I suggest using something like a smoother, a plastic putty knife or even a hard kitchen spatula.

Note: To maximize the stickiness of the wall decal, unroll it and lay it flat for a day before application. Not to mention, it also makes the product easier to work with.

Steps for How to Make a Chalkboard Wall Without Paint:

The video below explains the supplies you’ll need and steps to take for best results:

How to Clean a Chalkboard Wall:

You can simply use a damp cloth to wipe down your chalkboard. However, the manufacturer recommends using detergent-based wet wipes. They work the best at removing all chalk residue and dust. Not to mention, they’re ultra convenient.

Where Should You Put Your Chalkboard Wall?

Matte Black Chalkboard Wall with Stick-On Vinyl Decal Instead of PaintI love chalkboard walls because they inspire kids (as well as adults) to get creative. For instance, you can use them for drawing, playing games, doodling, brainstorming or leaving messages.

Plus, these easy-to-install, durable wall panels double as one-of-a-kind decoration for your home. In other words, they can enhance virtually any room of your home (they’re waterproof!)

Think playroom, kitchen, hallway, mudroom, entryway, dining room, closet, living room or home office! With the sophisticated, clean matte black finish, you can make your chalkboard walls look as professional or as playful as you want.

Specs for Vinyl Chalkboard Decals:

Chalkboard Decal for Wall

  • Dimensions: 9 Feet Long x 17.8″ Wide
  • Thickness: 120 Microns (upgraded thickness)
  • Weight: 8 ounces
  • Material: PVC Vinyl (Non-Toxic)
  • Waterproof
  • Self-Adhesive
  • Color: Matte Black
  • Includes Free Chalk
  • Model #: LX-1R
  • Brand: MMFB Arts & Crafts
  • Get the Chalkboard Wall Decal Here

SALE

Large Vinyl Chalkboard Wall Decal for Kitchens, Kids Rooms, School Classrooms, Making Labels and more

Create an Easy Chalkboard Wall for Under $15 $10?

7-Foot Long Chalkboard Wall Sticker to Write, Draw, Create Calendars & More. Cut to Size. Great for Kitchens, Kids, School, Labels. Get it Now.

BUY