DIY Chalkboard Refrigerator Panels…. Made Easy

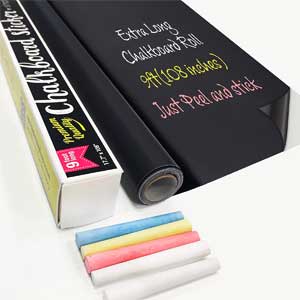
Roll of Peel and Stick Chalkboard Decal for Walls

Another way to create a custom look to your fridge is to add refrigerator door panels. However, refrigerator panels are usually expensive to buy, and often need to be custom made.

Instead, try the easy and inexpensive DIY method using vinyl chalkboard panels that stick in place. Plus, you can quickly remove them without damaging the surface of your fridge.

Do you have an old fridge that you are simply trying to hide? You may find that adding custom panels costs more than the fridge itself.

The Solution to Expensive Refrigerator Door Panels:

Magnetic Chalkboard Fridge Panels
courtesy of https://www.bobvila.com

Recently though, we’ve seen lots of DIY refrigerator door panels that are really cool-looking and easy to make. They don’t cost a lot in materials, and you don’t have to be a skilled craftsperson either. Some match the surrounding cabinets while others don’t. Of course, some include handy chalkboard panels.

There are several ways that you can go about this project, and it may involve some experimentation if you’re up for it. The panels you create will depend on the shape of your refrigerator doors, how you want the doors to look and whether or not you want them to match the rest of your kitchen. We’ve provided some ideas below.

How to Make Fridge Door Panels as Shown Above.

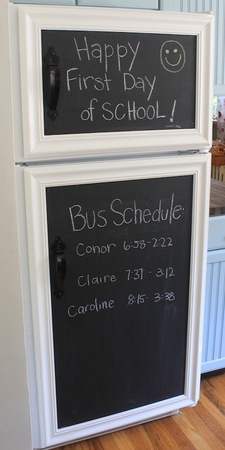
This is simply a white fridge with 2 chalkboard panels attached with heavy duty magnets. You can get magnets that screw into your chalkboard panels. Then stick securely to your appliance so you don’t have to worry about it moving when you open the door.

Get a thin sheet of plywood. Frame it with molding and paint the frame to match the color of your fridge. On the other hand, if you want your refrigerator to be a different color, paint everything. Also remember to remove any handles if necessary before attaching the panels.

As you can see, this project didn’t involve trying to conceal the fridge or match it to the cabinets (which are blue). However, it looks fresh and new and creates a cozy feel in the kitchen where it might otherwise have just looked like a dull, old appliance taking up space.

A nice bonus to this option is that it is not permanent.

Sophisticated Fridge Panel Project… Made Simple

Custom Paneled Refrigerator
courtesy of https://katiemxoxo.blogspot.com

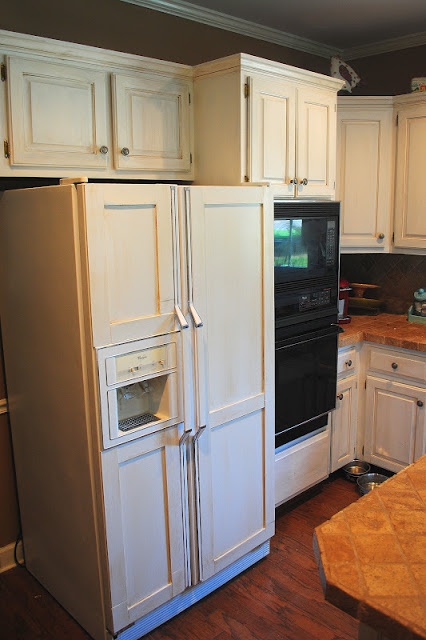
In this next example, you’ll notice that they added panels to the front. That said, they left the handles intact and simply worked around them (and the ice/water dispenser). Although it’s not completely hidden within the other cabinetry, this simple project gives it a custom look that makes it stand out less.

What they actually did here is quite crafty. They only added the panel frames and then painted the entire fridge 1 color. Less materials means a less expensive project. However, it may require more patience and skill to make it come out looking good. When doing this, it’s a good idea to add a bead of caulk along the inside seam of the frame where it touches the door so that it looks like it’s all one piece.

Another option is to paint the door within the frames with chalkboard paint (in any color, of course). If you wanted to go really crazy, you could make it a 4-color refrigerator!

How to Conceal Your Fridge Using Panels

White Refrigerator Door Panels
courtesy of https://www.pinterest.com

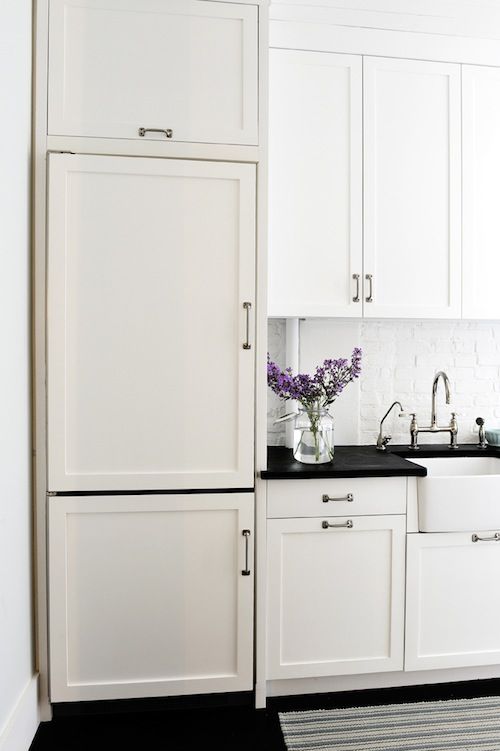
Do you have a smaller appliance or counter-depth fridge? You can more easily add door panels with matching cabinetry handles to fit in with the rest or your kitchen.

As you can see, the panels are extremely simple. You could make them using the techniques described above.

The matching kitchen hardware is key to making it look custom-made. Plus, you can fool your friends when they are trying to find a glass of juice.

Remember, these panels can also be painted with tinted chalkboard paint if you want. It will still look like a cabinet door.

Using Wallpaper on a Fridge?

Wallpaper-Covered Fridge Doors
courtesy of https://diy.roomzaar.com

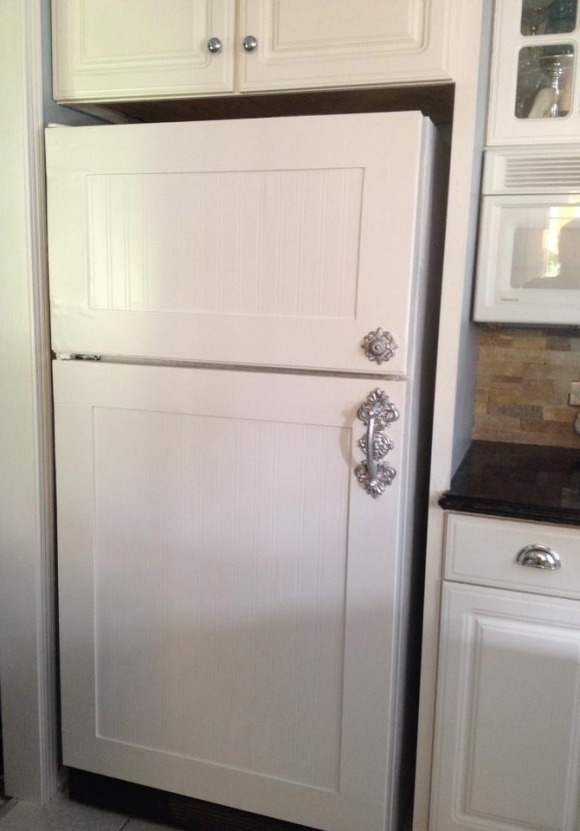
Check this one out. It’s got wallpaper on it. Yes, wallpaper.

The owner created the door panel frames and attached them to the doors over beadboard wallpaper.

You can use this simple and inexpensive technique to transform an entire kitchen without having to pay for a costly remodel.

It’s brilliant!

The door handles were actually purchased at a craft store and then spray painted silver, another cheap option to regular hardware.

courtesy of https://theoldpaintedcottage.com

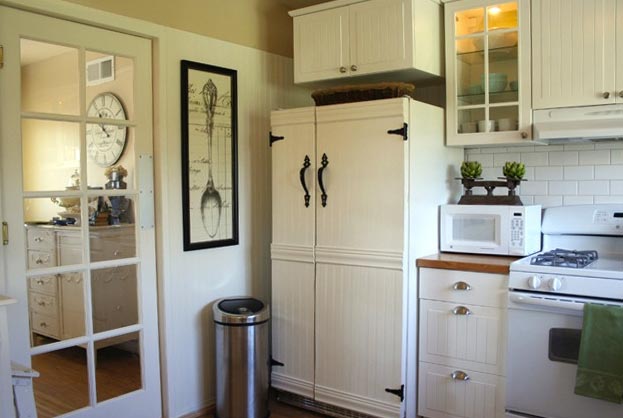
In this example, the owner used actually beadboard and attached the panels to the doors with a hot glue gun. Although the hardware doesn’t match the rest of the existing kitchen, the farm-style look fits right in with the rest of the decor – and once again, it fools the eye into thinking it is yet another storage cabinet.

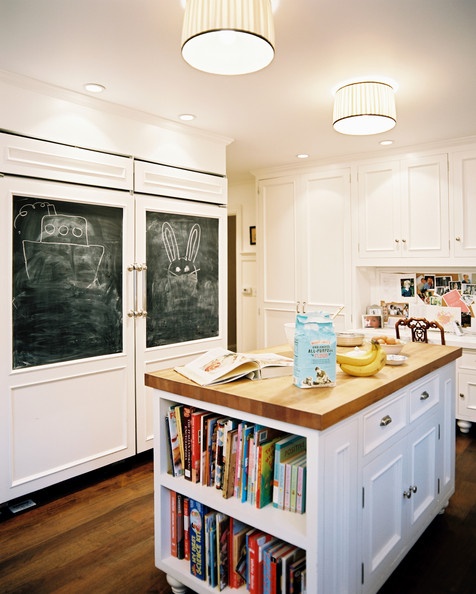
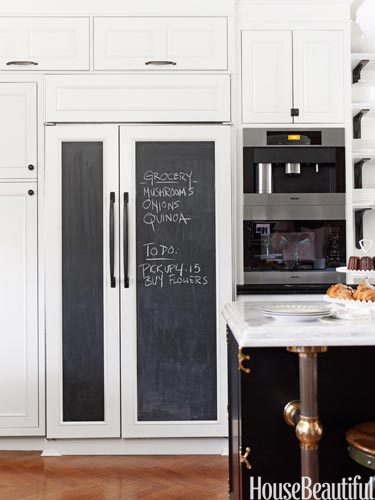
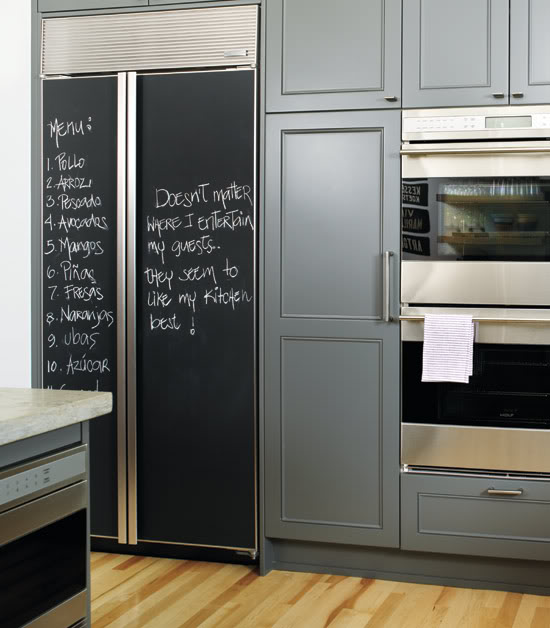
Photos/Ideas Using Chalkboard Refrigerator Panels:

Chalkboard Fridge Panels
courtesy of https://www.lonny.com
Chalkboard Painted Fridge Panels
from https://www.housebeautiful.com
Refrigerator Chalkboard Panels
courtesy of https://s693.photobucket.com/user/theliebertfamily/

Chalkboard Art – How to Do It

Blackboard and chalkChalkboard art can be a fun way to transform a wall, cabinet door or fridge into a work of art.

What’s cool about chalkboards it hat they don’t have to be perfect – they aren’t meant to be. People expect them to have a custom, unique and almost quirky look that is usually temporary and changeable. This means that you don’t have to be “good” artist to create and interesting piece that is visually appealing.

Creating chalkboard art doesn’t have to be about pictures, either. Some artists use a variety of different font styles to create to create an entire wall mural.

chalkboard fontUse individual words or write sentences. Create a menu, to do list or chalkboard calendar. There are lots of possibilities – and a refrigerator door is big enough to accommodate most of them. Check out these pictures for ideas and this inspirational gallery from Wheaton College students in Norton Massachusetts.

The great thing about creating art with fonts is that you can start with short words. Do a search for font styles online and print them out so you have an example to work from.

There are actually some fonts that aren’t that difficult, but they look really impressive. Add a little color to add even more dimension to your design.

When you are ready to start your design, draw it out on a piece of paper first (see this example). This gives you a template to work off of. Use a rag with a little water (or a q-tip for small spaces) to erase mistakes, make changes and create sharp, crisp edges around your art. This will help you create a cleaner, more finished look.


But your work of art doesn’t stop when you’ve finished it. Oh no! After that, it’s time to design a new one. Well, maybe not right away, but after a few months when you’re tired of your chalkboard art, you can literally erase it, clean your chalkboard and start with a clean slate.

Create new designs for the seasons, holidays, events or special occasions. Surprise family members or friends. In fact, it can be fun to have a “chalkboard party” and create a group mural where everyone can contribute a portion and you can have fond memories for months to come.

How to Make a Chalkboard Table

Chalkboard tables are super easy and inexpensive to make. Virtually any table can be converted to a chalkboard with chalkboard paint – or you can build a table from scratch.

My chalkboard table does double-duty as a coffee table and a to-do list. I work from home, so this is a great way to organize my projects and keep me focused. I can also doodle if I feel like it.

Chalkboard tables are also great for kids and families. You can write messages on them, play games or bring out your inner artist. They can be used as coffee tables, sawhorse tables or desks, craft areas or even your kitchen dining table.

How to Make a Sawhorse Chalkboard Desk

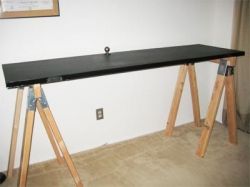
Saw Horse Desk: How to Make a Chalkboard TableAs far as large tables go, a sawhorse table is about the easiest and most versatile table you can make. The reason is that you can take it apart and move it around easily (with a hollow core door).

All you need is a door and a pair of sawhorses. Alternatively, you can make your own sawhorses with a set of sawhorse brackets and 2×4’s. Making your own sawhorses of course takes more time and effort, but there is an added benefit….

You can change out your sawhorse legs to make your table different heights. For example, standard table height, standing desk/bar table height and coffee table height. You only need one door, but you can switch out the legs when you need tables for different purposes without having to make an entirely new table.

And if that wasn’t enough, you can add a couple of 2×4’s underneath one length of the door to create a tilt in the desk surface.

Buy or Make Sawhorse Table Legs

There are several options when it comes to sawhorses. You can go with metal, wood or heavy duty plastic. Most are designed to carry a heavy load, so your choice really comes down to how much you want to spend and the look you want to create with your table.

My special, super-secret technique for sawhorse legs:

I make my sawhorse legs with 2×4’s and brackets. I cut the 2×4’s to size, do a light sanding and seal with either a clear varnish or stain. Not much to it.

The height measurements I use:

– For a standing desk I cut 2×4’s to 36″, which gives me a table height of about 40″
– For a standard table I cut 2×4’s to 26″, which gives me a table height of about 30″


Stanley 060864R Folding Sawhorse (2-Pack)


Fulton D300 Sawhorse Bracket


Stanley 60622 Folding Adjustable Sawhorse (2-Pack)

Chalkboard Painting Tips

I made the mistake of painting my homemade chalkboard table when it was cold. I then proceeded to paint with a roller instead of a brush. The result was thick, clumpy paint and a very textured door. Not ideal for drawing on.

The solution was fixable, but time consuming. I had to sand down the entire door and re-paint with a brush. My chalkboard table is still not entirely smooth, but it works.

By the way, I painted the reverse side of my door table and the door edges with regular black spray paint. I used gloss because that’s what I had, but I think flat paint would work just fine.

My suggestions are to:

– Not paint on a cold day
– Paint with a brush
– Make sure your painting surface is clean and smooth.
– Chalkboard Art – How to Do It

…Or Buy a Chalkboard Table

OK. I get it. You want a chalkboard table, but you don’t want to make it yourself. I’m fine with that. It takes time, and your first try may not look as good as the one you can buy at the store. Here is a cool one that you can buy – and it doesn’t cost a lot of money either. =)

Chalkboard Table Plans:


TIP: Did you know that you can actually make your own chalkboard paint using regular latex paint and powdered, non-sanded tile grout? Get more information here.

SALE

Large Vinyl Chalkboard Wall Decal for Kitchens, Kids Rooms, School Classrooms, Making Labels and more

Create an Easy Chalkboard Wall for Under $15 $10?

7-Foot Long Chalkboard Wall Sticker to Write, Draw, Create Calendars & More. Cut to Size. Great for Kitchens, Kids, School, Labels. Get it Now.

BUY